Botanical Garden Mother's Day Easel Card

A quick and simple handmade fun fold card.
I made a quick and simple handmade fun fold easel card for Mother's Day. It only took minutes to make.
In case it's helpful, below are the topics covered in this post:
Supplies and Stuff
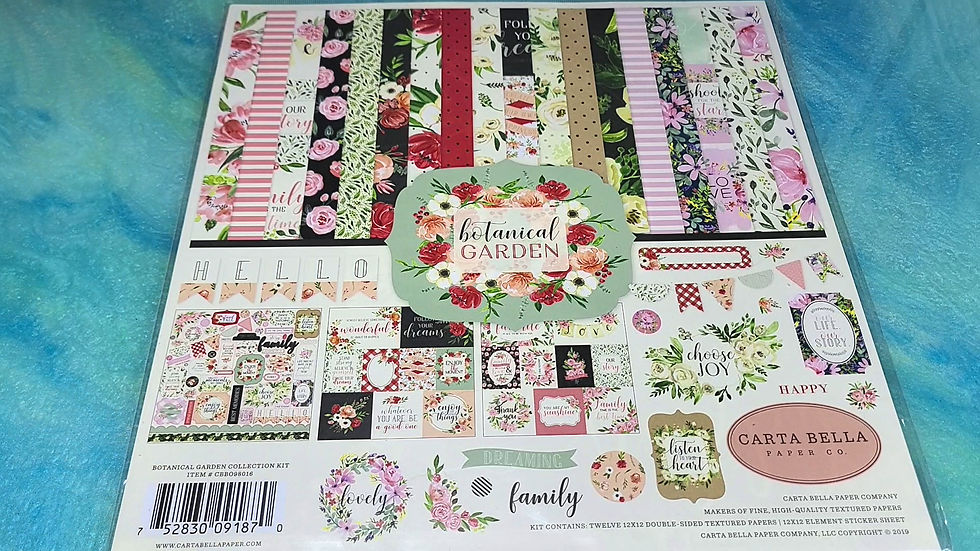
These are the items I used to make this simple card:
Paper cutter and score tool
Cardstock paper (solid color)
Decorative pattern paper
Stickers
Double-sided permanent tape
Scissors
I specifically used sheets from the Botanical Garden paper pack from the Carta Bella Paper Co. The sheets are thick with print on both sides. A sticker sheet was also included in the pack.
Making the Greeting Card

I started by choosing a text design from the paper pack. I trimmed the text design down to 5-1/2 inches in length to match the width of the card base I wanted to create.

I then selected a cardstock sheet that closely matched the pink roses on the text design. The pink cardstock served as the card base.

The pink cardstock was cut down to 8-1/2 inches by 5-1/2 inches for an A2 sized greeting card base. It was scored at 2-1/8 inch and 4-1/4 inch.
Scoring Paper Folded Paper
Once folded along the scored lines, the card base resembled an easel or accordion card design.
Tape Runner on Paper Placing Text Design on Paper
I ran my permanent double-sided tape on the small, folded end of the card base before the 2-1/8 inch score line. I then pressed the text design centered over the 2-1/8 score line. My text design was shorter than the half of the card base, so the 2-1/8 inch score line helped me line it up well to place it centered on the card front.

I selected an off-white cardstock sheet that matched the off-white area of the text design. I needed it to serve as a brace to prop the bottom end of the text design against. Otherwise, the text design wouldn't stay in an upright position resembling an easel.
Cut Paper Strip Placing Paper Strip
I cut the off-white cardstock down to 5-1/4 inches by 2-1/2 inches. I adhered the paper strip towards the bottom half inside the card base where I wanted the text design to prop against it.
Cutting Long Sticker Placing Long Sticker
Unfortunately, the cardstock wasn't thick enough to properly prop the text design in an upright position. I used a sticker from the paper pack to add a little extra depth to the edge of the paper strip that would prop up the text design. It worked better than not using the sticker at all.
My Thoughts
Card Front Card Front and Sentiment Upright Easel Card from Side
This was a quick and simple handmade fun fold easel greeting card. It took me no longer than ten minutes to make the card from beginning to end. Well, the video I recorded was no longer than ten minutes long, so it's likely it took me less time to make the card.
Card Front (Angled View) Upright Card from Left Angle Upright Card from Right Angle
While this was a unique card to make, and there are many easy easel card tutorials available online, it's probably not the best design to give someone who's unfamiliar with fun fold cards.
I handed my Dad this card to see what he thought. He opened it like a traditional greeting card and asked why it was partially complete. I imagine my Mom will think the same way.
What's Next?
I'm working on several crafty projects that are taking me longer than I anticipated, but a few should be done soon. Check pack to see what I finish next!
Comment below to share your favorite type of fun fold greeting card design.
Don't forget to subscribe below to be notified by email when I post something new.
Thanks, and have a great day!
Simply Jelly Jam


Comments